
Problem:
Setup FlexDisk VMDK in High Availability Mode
Notes:
NOTE: This solution supports only non-persistent environment.
NOTE: As a precaution take a snapshot of your VM before starting any new installation.
NOTE: These instructions are most useful for new deployments, for migrations several changes has to be made in your configuration beforehand.
Possible Resolution(s):
Before following the bellow instructions, please make sure to install a total of at least 3 ProfileUnity instances. One Primary instance, and two extra nodes that will server as High Availability Nodes during the installation. Only one ProfileUnity web interface will be used to deploy and control all other instances. It is not necessary to log in to the other nodes, because they will be controlled by the primary instance of ProfileUnity.
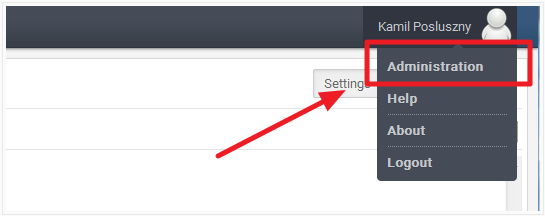
1. In your primary ProfileUnity console go to an Administration page (top-right)
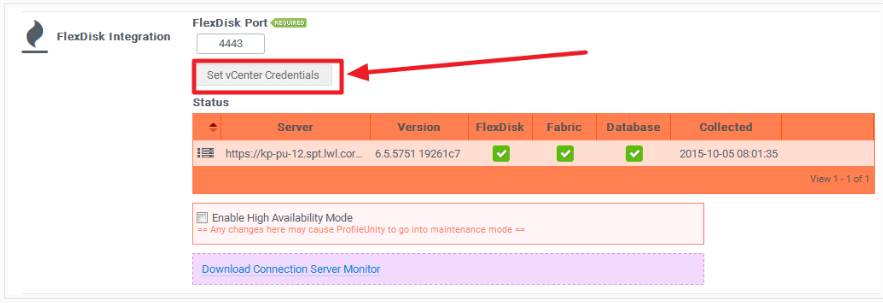
2. Look for a “FlexDisk Integration” section and provide vCenter Credentials, click update.
3. Check the box for "High Availability"

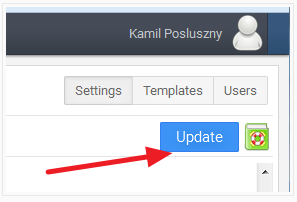
4.Click on the update button
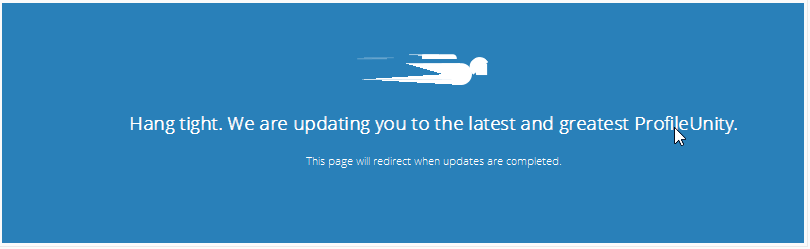
5. This screen will appear for some time. The web browser might blink several times during this process. It is normal Please wait, but if the page becomes unavailable it will be necessary to refresh the page.
6. Download the Connection Server monitor and install it on all View Connection Servers (not Security Servers).

During the installation of the Connection Server Monitor (CS monitor) the following window will show up.
The fabric node is your main ProfileUnity instance FQDN.
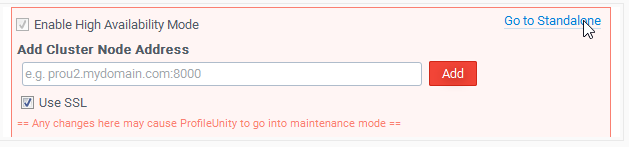
7. "Add Cluster Node Address" box should be active now, so it should be possible to add new nodes (ProfileUnity console installations). Please add at least 2 new nodes.
Note: the amount of nodes has to be odd. (1 node, 3 nodes, 5 nodes)
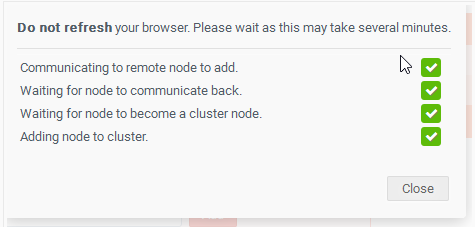
8. This screen will appear. The last step will take a little bit longer then the first two.
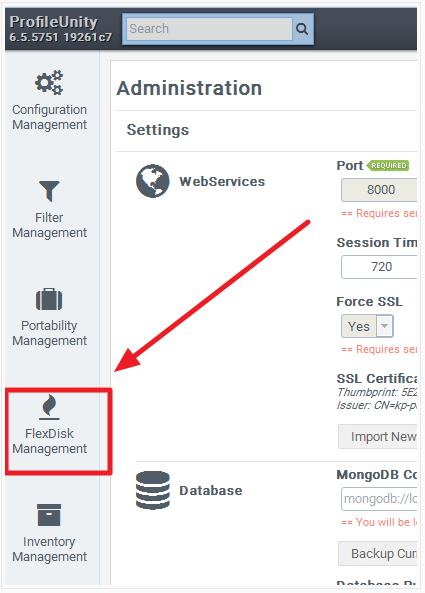
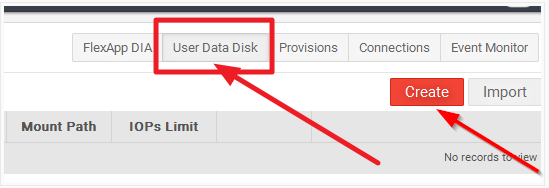
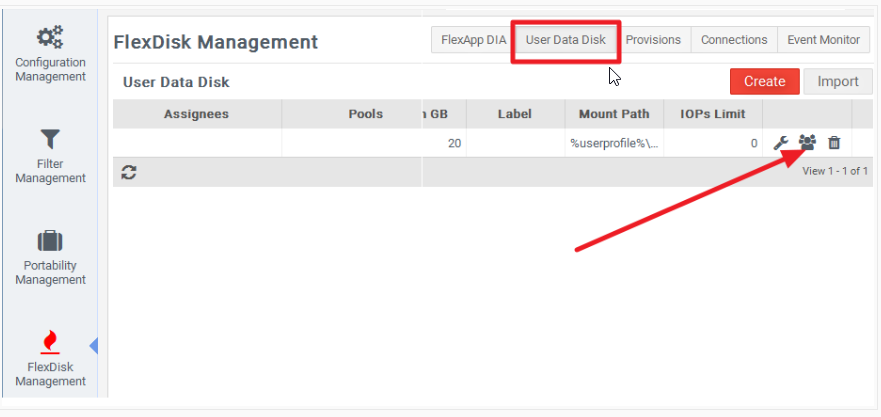
9. Click FlexDisk Management, select a "User Data Disk" tab, and click on a red "Create" button.
a)
b)
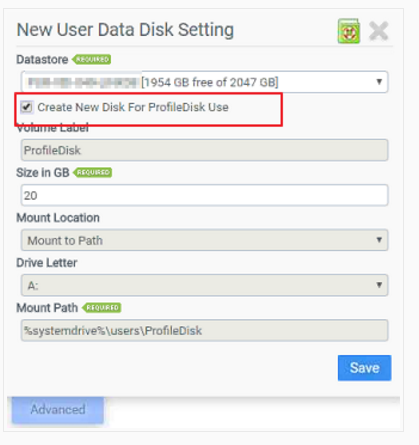
10.Select your datastore from the drop-down. The other options depend on a preference of the administrator.
Important: Select "Create New Disk For ProfileDisk Use"
11. Also, under "User Data Disk" make sure to assign the users/pools to your newly created disks by clicking the icon shown below.
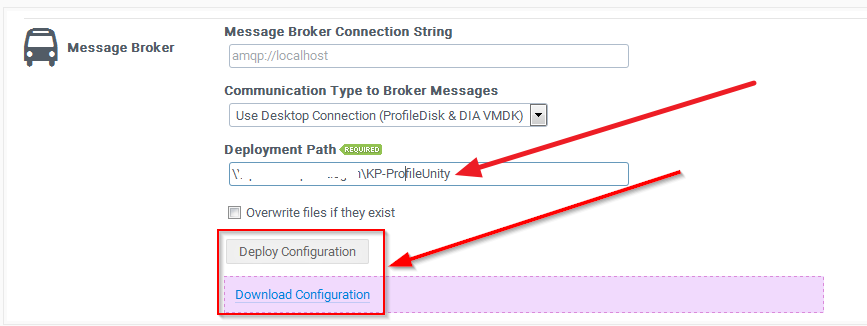
12. Go back to the Administration mage and find "Message Broker" section. Please make sure:
- "Message Broker Connection String" has empty field (DO NOT MODIFY THIS BOX WITHOUT TALKING WITH SUPPORT FIRST)
- "Communication Type to Broker Messages" is set to: "Use Desktop Connection (ProfileDisk & DIA VMDK)"
- The connection broker is showing a correct "Deployment Path" (Ex. netlogon\ProfileUnity)
- Click "Deploy Configuration" or "Download Configuration".
NOTE: By deploying the configuration you update your "nodes.xml" which is a ProfileDisk configuration file.
13. Important step: Please reinstall the ProfileUnity client!! (Run LwL.ProfileUnity.Client.Startup.exe with the correct nodes.xml present in the same director) on the master image of your pools before recomposing your pools. The above (FlexDisk) setting need to be implemented early before the logn; therefore, they require a recompose of the VMs.
Note: Step #12 and #13 will need to be repeated if there are any nodes added or removed from the nodes ProfileUnity cluster.
Product: ProfileUnity-FlexApp
Product Version: 6.5